Buying makeup for beginners without overbuying
a[data-rs-seo-link]{text-decoration:underline!important;color:#1a56db!important;cursor:pointer!important;}a[data-rs-seo-link]{text-decoration:underline!important;color:#1a56db!important;cursor:pointer!important;}
Start with a small kit that fits real life
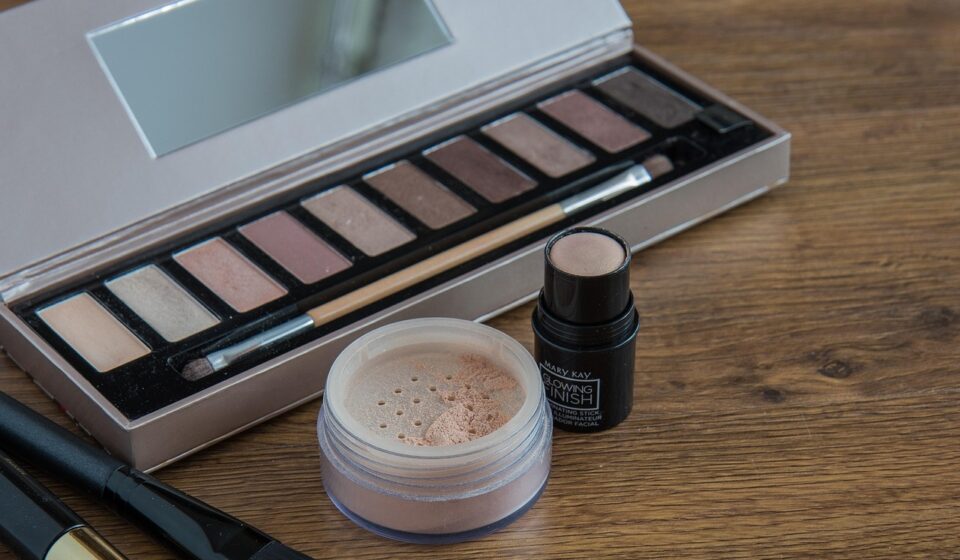
If you are buying makeup for beginners, the best first step is usually not a large palette or several foundations. Start with a compact kit that supports one simple everyday look: prepared skin, light complexion coverage, defined brows or lashes, a little cheek color, and a lip product you will actually reapply. A practical starter kit usually includes moisturizer or primer if needed, sunscreen for daytime, concealer or skin tint, optional powder, brow gel or pencil, mascara, blush, one neutral eye product, lip color, makeup remover, and a few basic tools.
The aim is to learn what suits your skin, face shape, schedule, and comfort level before spending on more advanced products. This guide focuses on what to purchase first, what to delay, and how to avoid common beginner mistakes. For more shopping frameworks, visit the Buying Guides section.

The beginner makeup checklist
A beginner kit should be easy to use, easy to store, and flexible enough for work, school, errands, dinner, or photos. Think in categories rather than brand names. You do not need every category on day one, but this checklist helps define what belongs in a functional starter bag.
| Category | Beginner-friendly choice | Why it helps | Can wait if |
|---|---|---|---|
| Skin prep | Moisturizer, sunscreen for daytime, or a simple primer | Helps makeup sit more evenly and reduces patchiness | Your skin already feels balanced under makeup |
| Complexion | Skin tint, tinted moisturizer, light foundation, or concealer | Evening the complexion often makes the biggest visual difference | You prefer bare skin and only want brows, lashes, and lips |
| Setting product | Translucent powder or setting spray | Controls shine or helps makeup last longer | Your skin is dry or your base already wears well |
| Brows | Clear brow gel, tinted gel, or slim pencil | Frames the face with little effort | Your brows are already full and shaped |
| Eyes | Mascara and one neutral shadow stick or small palette | Adds definition without advanced blending | You have sensitive eyes or do not enjoy eye makeup |
| Cheeks | Cream or powder blush | Adds color back after complexion products | You naturally flush or want the most minimal routine |
| Lips | Tinted balm, gloss, satin lipstick, or lip liner | Easy to reapply and finishes the look | You already use a tinted balm daily |
| Tools | One sponge, one complexion brush, one fluffy eye brush, lash curler if desired | Improves application control | You prefer applying cream products with clean fingers |
| Removal | Gentle cleanser, cleansing balm, micellar water, or eye makeup remover | Prevents leftover makeup from building up on skin and lashes | Never skip this category |
For many beginners, the highest-value purchase is not a dramatic eye palette. It is a base product that matches, a flattering blush, a comfortable lip product, and a mascara or brow product that makes the face look more awake. These products are also easier to practise with than liquid eyeliner, heavy contour, or bright pigments.
Choose formulas by skin type before choosing trends
Makeup usually looks better when it works with your skin instead of fighting it. A foundation that looks smooth on dry skin may separate quickly on oily skin. A matte powder routine that controls shine for one person can make another person look textured. Before following a viral product recommendation, look at what your skin tends to do by midday: oily, dry, balanced, sensitive, acne-prone, or combination.
For oily or combination skin
Look for lightweight, long-wear, oil-free, or soft-matte complexion products. A small amount of powder on the T-zone can be enough. Beginners often over-powder the whole face and then find that the base looks heavy. If your cheeks are dry but your forehead and nose get shiny, set only the shiny areas.
For dry skin
Hydrating skin tints, satin foundations, cream blush, and minimal powder are usually easier to manage. Dry skin can make full-coverage matte foundation cling around the nose, mouth, and under-eyes. If you want coverage, use a thin layer of hydrating base and spot-conceal only where needed.
For acne-prone or sensitive skin
The American Academy of Dermatology advises acne-prone makeup users to look for labels such as oil-free, non-comedogenic, or won’t clog pores. These terms do not guarantee that every product will suit every person, but they are more useful than buying purely by trend. The U.S. Food and Drug Administration has also noted that terms such as hypoallergenic, fragrance-free, and for sensitive skin do not have a single federal definition in the United States, so ingredient awareness still matters.
If your skin reacts easily, introduce one new product at a time. Wear it for a short period before using it for a long event. This is slower than buying a full routine at once, but it makes it easier to identify what caused a reaction if irritation occurs.
Match shades in a way beginners can repeat
Shade matching can feel difficult because beauty brands use different naming systems. One brand’s neutral beige can look peach on you, while another brand’s light medium can look olive. Instead of trying to memorise every undertone term, start with a simple three-part check: depth, undertone, and oxidation.
Check depth first
Depth means how light or deep the shade is. Test complexion products along the lower cheek and jaw, not only on the wrist. Your wrist may be a different colour from your face and neck. A good everyday match should blend into the area where your face meets your neck in natural light.
Then check undertone
Undertone describes the background tone of the skin. Warm undertones often lean golden, peach, or yellow. Cool undertones may lean pink, red, or blue. Neutral undertones sit somewhere between. Olive undertones can look greenish or muted and may find many foundations too orange or too pink. Beginners should avoid buying several shades online unless the retailer has a clear return policy or shade-matching support.
Watch for oxidation
Some complexion products darken or shift colour after they dry down. Apply a small amount, wait several minutes, and check it again in daylight. If it turns orange or grey, the undertone or formula may not suit you. This waiting step can prevent one of the most common beginner purchases: a foundation that looked fine in store lighting but looks wrong at home.
What to buy first and what to add later
A beginner makeup collection should grow in stages. Stage one is the everyday kit. Stage two is the occasion kit. Stage three is experimentation. Buying in this order keeps spending under control and gives each product a clear purpose.
Stage one should cover daily makeup
Start with skin prep, one complexion product, concealer if needed, brow product, mascara or a lash tool, blush, lip product, and makeup remover. If you prefer a very natural look, you may skip foundation and use concealer only around the under-eyes, redness, or blemishes. If you wear glasses, defined brows and lashes may make more difference than eyeshadow.
Stage two can include products for longer wear
Once you know your daily preferences, add a setting powder, setting spray, eyeliner, bronzer, or a slightly bolder lip. This is also when you can choose products for weddings, parties, job interviews, or photography. Longer-wear products can be useful, but they may require better removal at night.
Stage three is for colour and technique
Large palettes, liquid liner, contour, false lashes, and bold lip colours can be enjoyable, but they are not essential for learning. Wait until you know whether you prefer creams or powders, sheer or full coverage, warm or cool colours, and natural or defined finishes. A smaller collection that gets used is better than a crowded drawer full of nearly identical products.
Beginner tools and hygiene matter as much as the products
Tools change how makeup performs. A damp sponge can sheer out foundation. A dense brush can build coverage. Fingers can warm cream blush and skin tint, making them easy to blend. You do not need a professional brush set, but you do need clean tools and a reliable way to remove makeup. See also: Beauty Ingredients.
The American Academy of Dermatology advises makeup users not to share brushes and to wash them often, because oil, skin cells, and product residue can collect on applicators. For beginners, a realistic routine is to wash frequently used complexion brushes and sponges at least weekly, then let them dry fully before storing them. Avoid drying brushes upright while wet because water can run into the handle and loosen the glue.
Eye products deserve extra caution. The FDA warns against adding water or saliva to mascara and advises discarding eye-area cosmetics used during an eye infection. It also notes that cosmetics exposed to heat, such as those left in hot cars, may deteriorate faster. These points are not glamorous, but they are central to safe makeup use.
When you open a product, write the date on a small sticker or keep a note in your phone. Many products display a period-after-opening symbol, such as 6M or 12M, to suggest how long the product is intended to be used after opening. If a product changes smell, texture, colour, or causes irritation, stop using it even if it is not technically old.
A simple 10-minute beginner routine
A beginner routine should be repeatable. Once you can do the same look comfortably, you can adjust finish, colour, and coverage.
- Prep the skin. Cleanse if needed, apply moisturizer, and use sunscreen during the day. Let skin care settle before applying makeup.
- Apply light base. Use skin tint, tinted moisturizer, or foundation only where you want evening. Blend outward in thin layers.
- Spot-conceal. Add concealer under the eyes, around redness, or on blemishes. Pat rather than rub.
- Set selectively. Powder only areas that crease or get shiny. Keep dry areas flexible.
- Shape brows. Brush brows upward and fill sparse areas lightly, following the natural direction of the hair.
- Add cheek color. Smile gently and apply blush to the area that lifts the face. Blend the edges well.
- Define lashes. Curl lashes if desired, then apply mascara from root to tip. Avoid pumping the wand in the tube because it can push air into the product.
- Finish lips. Use balm, gloss, liner, or lipstick in a shade you can reapply without stress.
- Remove thoroughly at night. Use a remover that dissolves the products you wear, then cleanse gently.
This routine can be made more polished with eyeliner, bronzer, or eyeshadow, but the base structure stays the same. Beginners usually improve faster by repeating a simple process than by changing every product every day.
Common beginner buying mistakes
The first mistake is buying for an imaginary lifestyle. If you rarely wear bold makeup, a dramatic palette may not be the best first purchase. If you need quick morning makeup, choose products that blend easily and do not require multiple brushes.
The second mistake is choosing full coverage because it seems more professional. Full coverage can be useful, but it is less forgiving when the shade is slightly off or the skin is not well prepped. Sheer and medium coverage products are often better teachers because you can see how much product you really need.
The third mistake is ignoring removal. Waterproof mascara, long-wear lipstick, and transfer-resistant foundation can be excellent, but they need proper removal. Rubbing harshly around the eyes can cause discomfort, so pair long-wear products with a suitable remover from the beginning.
The fourth mistake is buying duplicates too early. Many beginners buy several nude lipsticks, several brown palettes, or multiple foundations before learning which tones suit them. Test one category properly before expanding it.
The fifth mistake is relying only on store lighting, filters, or online swatches. Lighting changes everything. Whenever possible, check complexion and lip shades near a window or in natural light before deciding.
Frequently asked questions
How much makeup should a beginner buy?
Most beginners can start with 7 to 10 items, including tools and remover. A useful starter kit might include moisturizer or primer, sunscreen for daytime, concealer or skin tint, optional powder, brow gel or pencil, mascara, blush, lip product, one basic brush or sponge, and remover. Add products only when you know what problem you want them to solve.
Should beginners use foundation or tinted moisturizer?
Tinted moisturizer or skin tint is often easier because it is more forgiving and usually looks natural in thin layers. Foundation is better if you want more coverage or a more polished finish. If you are unsure, choose light to medium coverage and spot-conceal rather than covering the entire face heavily.
Is drugstore makeup good enough for beginners?
Yes. Beginner success depends more on shade match, formula choice, application, and removal than price alone. Affordable products are often a smart way to learn your preferences before investing in higher-priced items.
What makeup product should I buy first?
If you want the most natural everyday effect, start with a complexion product or concealer that matches well, plus brow gel, mascara, blush, and a comfortable lip product. If you do not want complexion coverage, start with brows, lashes, cheeks, and lips.
How do I know when makeup should be replaced?
Follow the product’s label guidance, note the date you opened it, and pay attention to changes in smell, texture, colour, or performance. Replace products sooner if they irritate your skin or eyes, if they were used during an eye infection, or if they were stored in heat or dirty conditions.