Artificial nail tips for safer application, wear, and removal
a[data-rs-seo-link]{text-decoration:underline!important;color:#1a56db!important;cursor:pointer!important;}a[data-rs-seo-link]{text-decoration:underline!important;color:#1a56db!important;cursor:pointer!important;}
What artificial nail tips are and when to use them
Artificial nail tips are pre-shaped extensions attached to the free edge or surface of the natural nail to add length, shape, or a ready-made manicure base. They may be used with glue, adhesive tabs, acrylic overlay, hard gel, builder gel, or soft gel systems, depending on the design and product instructions. The purpose is not just to make the nail look longer. A good set should fit the nail plate, avoid pressure points, and be removable without tearing the natural nail. Safer application starts before any adhesive is opened: choose the correct size, prepare the nail gently, keep products away from irritated skin, and stop if burning, swelling, lifting, or pain develops.
This guide focuses on practical handling: how to select artificial nail tips, apply them cleanly, maintain them during wear, and remove them with less stress on the nail. For more manicure care articles, visit our Usage Tips section.
Choose the right tip before thinking about design
Even an attractive set can feel uncomfortable if the tip is too narrow, too flat, too curved, or too heavy for the natural nail. Fit should come before color, length, or nail art. A tip should sit from sidewall to sidewall without being forced down, and the contact area should lie flat enough for adhesive to spread evenly. If you need to press hard to make the tip touch the nail, it is probably the wrong curve.
Common types of artificial nail tips
| Tip type | How it is commonly used | What to watch |
|---|---|---|
| Half-well tips | Attached near the free edge and blended before an overlay | Over-filing during blending can thin the natural nail |
| Full-well tips | Cover more of the natural nail for a stronger contact area | Poor sizing may create bulk near the cuticle area |
| Full-cover press-on tips | Used as a complete nail look with tabs or glue | Water trapped underneath can increase lifting and hygiene concerns |
| Soft gel tips | Applied with gel adhesive and cured with a compatible lamp | Improper curing or skin contact can increase irritation risk |
| Clear or natural tips | Used as a base for polish, gel, acrylic, or nail art | Clear tips can make air bubbles and uneven adhesive easier to see |
Length also affects wear. Very long tips place more leverage on the natural nail, especially during routine tasks such as typing, washing hair, opening cans, or catching the nail on clothing. For first-time extension users, a shorter starting length is usually easier to manage, and the shape can be refined after the tip is secured. A moderate oval, squoval, or short almond shape often wears more comfortably than a long square or stiletto tip because it has fewer corners to catch.
How to size tips accurately
Measure each nail individually instead of assuming both hands match. Many people need different sizes on the left and right hand. If a tip is slightly too large, file the sides carefully before application. If it is too small, do not stretch it over the nail; pressure can cause discomfort, lifting, or stress cracks. Pre-sizing all ten tips before applying adhesive prevents rushed decisions once glue is open or gel is on the brush.
Prepare the natural nail without overworking it
Preparation should leave the surface clean and lightly matte, not thin or sore. Wash hands, dry thoroughly, remove old polish, and gently push back only the non-living tissue that sits on the nail plate. The American Academy of Dermatology advises being careful with cuticles because they help protect the nail area from infection. Aggressive cutting, scraping, or forceful pushing is not a shortcut to a cleaner manicure.
Lightly buff the shine from the natural nail only if the product system requires it. Avoid heavy filing on the nail plate, especially near the cuticle and sidewalls. Remove dust with a clean brush or lint-free wipe. If you use dehydrator or primer, apply only the amount recommended for that system. More product does not automatically mean better adhesion, and flooding the surrounding skin can increase irritation.
Do not apply artificial nail tips over nails that are green, yellow, painful, lifting from the nail bed, bleeding, swollen, or unusually thick. Artificial nails can hide a problem and make changes harder to notice. If a nail condition is persistent or painful, pause cosmetic application and seek professional advice.
Apply tips with control, not speed
A clean application depends on small, controlled steps. Lay out the tips in order from thumb to little finger, check the fit again, and keep adhesive away from the skin. Whether you use nail glue, adhesive tabs, acrylic, or gel adhesive, follow that product system’s directions instead of mixing it casually with unrelated products.
- Clean and dry the natural nail fully before application.
- Select the correct tip size for each nail and refine the sidewalls if needed.
- Apply a small, even amount of adhesive to the contact area rather than flooding the nail.
- Place the tip at the intended angle and press evenly to push out air pockets.
- Hold until the bond feels secure, following the product timing rather than guessing.
- Trim length gradually and shape with a file instead of cutting aggressively in one motion.
- If using overlay, keep acrylic, gel, or builder product off the surrounding skin.
Air bubbles are more than a cosmetic issue. They can weaken the bond and create spaces where moisture collects after handwashing or showering. If a tip lifts immediately, it is usually better to remove and redo it than to force more glue into the gap. Adding glue under a lifted area can trap debris and make later removal more difficult.
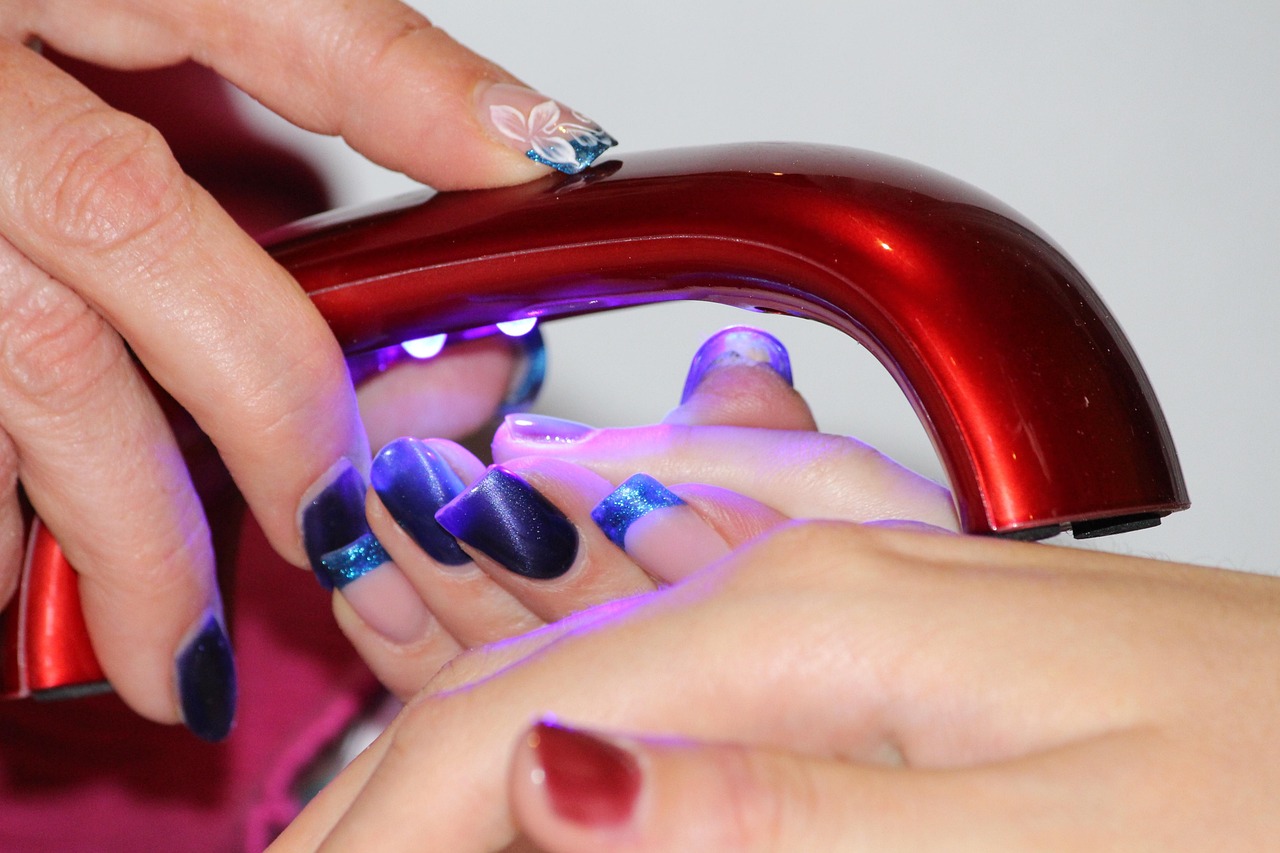
For soft gel tips, curing is a critical step. Use the lamp type and cure time recommended by the product manufacturer. Under-cured gel can remain softer than expected and may raise irritation concerns, while over-filing after curing can damage both the enhancement and the natural nail. If a gel system causes heat spikes, stinging, or skin irritation, stop and reassess the amount used, lamp compatibility, and skin contact.
Wear and maintain artificial tips with hygiene in mind
Artificial tips are beauty products, but they still affect how the hands are cleaned and used. The U.S. Centers for Disease Control and Prevention notes that germs can remain under artificial fingernails even after handwashing or alcohol-based sanitizer. The CDC also advises healthcare personnel who work directly with high-risk patients, such as those in intensive care or operating room settings, not to wear artificial fingernails or extenders. For everyday beauty users, the practical takeaway is clear: keep the underside clean, avoid unnecessary lifting, and be realistic about settings where long nails may not be appropriate.
Maintenance should focus on three points: dryness, lifting, and skin response. Dry hands thoroughly after washing, especially under the free edge. Avoid using nails as tools to pry, scrape, or open packaging. Wear gloves for prolonged wet work or harsh cleaning products. If one nail lifts, catches, or becomes painful, repair or remove it promptly instead of waiting for the full set to fail.
The U.S. Food and Drug Administration identifies methyl methacrylate monomer as a nail product ingredient of special safety concern and notes that it is still occasionally found in some artificial nail products. OSHA also lists methacrylate compounds, glues, removers, and dust among nail salon chemical exposure concerns, with ventilation and safe work practices emphasized for workers. For home users, this supports a practical approach: work in a ventilated area, cap products quickly, avoid breathing dust, and do not ignore strong irritation from liquids, powders, glues, or gels. See also: Beauty Ingredients.
Signs that a set should come off
- Pain, throbbing, or pressure under the tip
- Redness, itching, swelling, or rash around the nail folds
- Green, dark, or unusual discoloration under the enhancement
- Repeated lifting that allows moisture underneath
- Cracks that reach into the natural nail
- A sudden allergy-like reaction after using glue, gel, primer, or acrylic liquid
Do not cover warning signs with polish or another layer of product. A clean finish is not worth hiding irritation or possible infection. If symptoms are severe, spreading, or do not improve after removal, consult a qualified health professional rather than relying on a beauty tutorial.
Remove artificial nail tips without tearing the nail
Removal is where many otherwise careful manicures go wrong. The most damaging habit is prying. When a tip is lifted with force, layers of the natural nail can come away with it, leaving the surface thin, rough, and sensitive. The correct removal method depends on the product. Press-ons with adhesive tabs may loosen with warm water and oil. Glue-on tips and many acrylic systems often require careful soaking. Some hard gels are not soak-off and need professional filing.
Start by shortening the extension to reduce leverage. File away glossy topcoat or bulky overlay only as much as needed for the removal system to work. If using acetone, protect surrounding skin with a small amount of oil or balm, then soak according to the product type. As the enhancement softens, gently slide softened material away with light pressure. If it resists, soak longer rather than scraping harder.
After removal, wash hands, moisturize, and let the nails settle before deciding whether to reapply immediately. If the nail plate feels hot, painful, papery, or visibly damaged, take a break from extensions. A break will not repair the entire nail overnight, but it can reduce repeated mechanical stress while new nail grows forward.
Common mistakes and better alternatives
| Mistake | Why it matters | Better approach |
|---|---|---|
| Using a tip that is too small | It creates pressure and can lift at the sides | Choose a wider tip and file it down to fit |
| Flooding glue or gel onto skin | Skin contact can increase irritation and messy lifting | Use a small amount and clean edges before curing or setting |
| Over-buffing the natural nail | It weakens the nail plate and can make removal painful | Remove shine lightly only when required |
| Ignoring lifting | Moisture and debris can collect underneath | Repair or remove the nail promptly |
| Prying tips off | It can peel natural nail layers away | Soak, soften, and remove gradually |
The most reliable artificial nail routine is not the fastest one. It is the one that respects fit, skin safety, product directions, and removal. When those basics are handled well, the finished set looks cleaner and the natural nails are less likely to pay the price later.
Frequently asked questions
Are artificial nail tips the same as acrylic nails?
No. Artificial nail tips are the extension pieces that add length or coverage. Acrylic nails are a product system made with liquid monomer and powder polymer. Many acrylic sets use tips as the base, but tips can also be used with press-on glue, gel adhesive, builder gel, or other overlay systems.
Can I reuse artificial nail tips?
Some full-cover press-on nails may be reusable if they are removed gently, cleaned, and not cracked or distorted. Tips that have been blended, covered with acrylic, or cured into gel systems usually are not practical to reuse because their structure and fit change during wear and removal.
How long should I wear artificial nail tips?
There is no single safe wear time for everyone. Adhesive type, nail growth, handwashing habits, length, and lifting all matter. Remove or refresh a set when it lifts, becomes painful, traps moisture, or no longer fits securely. Do not keep a set on simply because it still looks acceptable from above.
Are artificial nail tips suitable for weak nails?
They can make weak nails look stronger temporarily, but they do not treat the underlying weakness. Heavy filing, strong adhesives, and rough removal can make fragile nails worse. If your nails are peeling or sore, choose shorter lengths, gentler adhesive options, or a break before using extensions again.
What is the safest way to make tips last longer?
Choose the correct size, prep gently, keep adhesive off the skin, avoid using nails as tools, dry under the free edge after washing, and fix lifting early. Longer wear should come from better fit and care, not from applying excessive glue or ignoring discomfort.